The Aprilaire 700 Installation Manual is a comprehensive guide for installing the Aprilaire 700 humidifier, designed for homeowners and professionals alike. It covers essential steps, safety precautions, and troubleshooting tips to ensure proper setup and optimal performance of the humidifier system.
Overview of Aprilaire 700 Humidifier
The Aprilaire 700 is a high-efficiency whole-house humidifier designed for homes with forced air heating systems. It can cover areas up to 4,200 square feet, making it suitable for medium to large homes. The humidifier uses evaporative technology to add moisture to the air, ensuring optimal indoor humidity levels. It is available in two models: the 700M for manual control and the 700A for automatic operation. The system is designed to work seamlessly with HVAC systems, providing consistent humidity control and reducing issues like dry air and static electricity. Its compact design and quiet operation make it a popular choice for homeowners seeking reliable humidity management.
Importance of Proper Installation
Proper installation of the Aprilaire 700 humidifier is essential for ensuring safety, efficiency, and optimal performance. Incorrect installation can lead to electrical hazards, water damage, or reduced humidity control. Following the manual’s guidelines guarantees correct setup, preventing issues like mold growth or uneven humidity distribution. Proper installation also ensures compliance with safety standards, protecting both the system and the homeowner. Additionally, it maximizes energy efficiency and extends the lifespan of the humidifier. Always refer to the official Aprilaire 700 installation manual for detailed instructions to avoid potential risks and ensure a reliable, long-lasting humidification system for your home.
Pre-Installation Requirements
Before installing the Aprilaire 700, ensure the location is suitable, power supply is available, and all necessary tools and materials are on hand for a smooth process.
Tools and Materials Needed
To install the Aprilaire 700 humidifier, gather essential tools and materials, including a drill, screwdriver, wire connectors, and a 1/2″ drill bit for mounting. Ensure you have a 6″ duct, water supply line, and drainage tubing. Electrical components like 14/3 or 14/4 wire and a 20A circuit breaker are required. A transformer may be needed for power supply. Use a hygrometer for humidity monitoring. Refer to the manual for specific materials and tools to ensure a seamless installation process. Proper preparation prevents delays and ensures compliance with safety standards.
Understanding the Installation Location
Choose a suitable location for the Aprilaire 700 humidifier, typically in the supply or return plenum of your HVAC system. Ensure it’s away from direct sunlight and moisture-prone areas. The ideal installation height for components like the cooker hood is between 650mm to 700mm above the hob. Proper clearance is essential to avoid obstructions and ensure airflow. The humidifier should not be installed in the transformer primary circuit, as it requires 120 VAC power. Selecting the right location ensures efficient performance and compliance with safety standards. Always refer to the manual for specific placement guidelines to optimize humidity control and system efficiency.
Step-by-Step Installation Process
Follow the Aprilaire 700 manual for a systematic approach: unpack components, mount the humidifier, connect water supply and drainage, install the control, wire the system, and finalize connections.
Unpacking and Inventory of Components
Start by carefully unpacking the Aprilaire 700 humidifier and its accessories. Ensure all components, such as the humidifier unit, control panel, wiring harness, water panel, and mounting hardware, are included. Verify the model number matches your purchase and refer to the manual for a detailed inventory list. Check for any visible damage or missing parts. If discrepancies are found, contact the supplier immediately. Organize the components in a clean, dry workspace to avoid misplacement. Familiarize yourself with each part’s purpose before proceeding to the installation steps. This ensures a smooth and efficient setup process. Proper organization is key to avoiding delays. Always follow the manual’s guidelines for unpacking and inventory.
Mounting the Humidifier
Mount the Aprilaire 700 humidifier securely on the designated location, ensuring it is level and firmly attached. Choose a spot with adequate airflow and accessibility for maintenance; Use the provided hardware, such as screws or brackets, to fasten the unit to the plenum or ductwork. Ensure all connections for water supply and drainage are within reach. Avoid mounting in areas prone to moisture accumulation or extreme temperatures. Follow the manual’s specific torque guidelines to prevent damage. Double-check the installation for stability and proper grounding to meet safety standards. Ensure compliance with local building codes and manufacturer recommendations for optimal performance. Proper mounting is essential for efficient operation and longevity of the humidifier.
Connecting Water Supply and Drainage
Connect the water supply to the Aprilaire 700 by attaching the provided tubing to the designated inlet on the humidifier. Ensure the tubing is securely fastened to prevent leaks. For drainage, connect a drain line from the humidifier to a nearby floor drain or condensate pump. Use appropriate tubing and ensure proper slope for unobstructed water flow. Refer to the manual for specific tubing size and material recommendations. Secure all connections with watertight fittings, such as Teflon tape on threaded connections. Avoid installing in the transformer primary circuit. Test the system for leaks and proper drainage functionality after installation. Proper connections are crucial for efficient operation and to prevent water damage.
Installing the Humidifier Control
Install the Aprilaire 700 Humidifier Control in the return duct or on a wall in the living space. For duct installation, remove the knob and cover to mount the control securely. Ensure the control is level and accessible for adjustments. If installing manually, replace the outdoor temperature sensor with a plastic resistor case and attach the manual faceplate. Refer to the wiring diagram for proper connections, ensuring the control is wired to the humidifier and power source. Do not install the control in the transformer primary circuit. Test the control operation after installation to ensure proper functionality and humidity regulation. Follow the manual for detailed wiring instructions.
Wiring the Humidifier
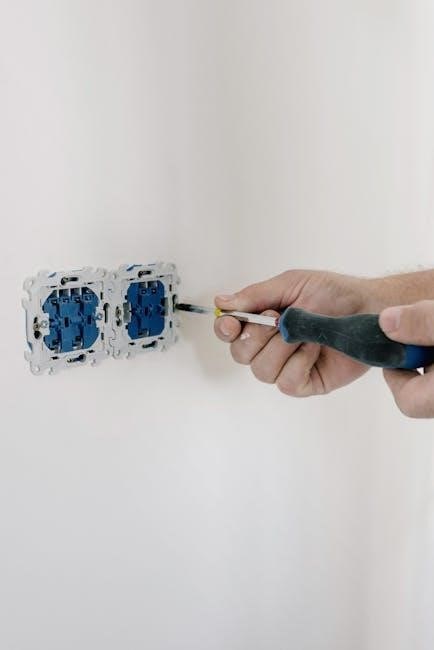
Refer to the wiring diagram provided in the Aprilaire 700 manual for precise connections. Ensure the humidifier is wired to a 24 VAC circuit, as specified. Do not connect the wiring to the transformer primary circuit, as this can cause electrical issues. Connect the humidifier control to the power source and ensure all terminals are securely fastened. Verify that the wiring matches the diagram, paying attention to color-coded wires for correct polarity. Double-check all connections before powering on the system. If unsure, consult the manual or seek professional assistance to avoid electrical hazards. Proper wiring ensures safe and efficient operation of the humidifier.
Final Connections and Adjustments
After completing the wiring, ensure all connections are secure and double-checked against the wiring diagram. For Model 700M, install the manual control in the return duct or on the wall in the living space, removing the knob and cover if wall-mounted. Adjust the humidistat to the recommended settings and verify proper water flow through the system. Ensure the drain line is correctly routed and functioning. For manual mode, replace the outdoor temperature sensor with a plastic resistor case and attach the manual face plate. Refer to the control installation manual for final system checkout. Always follow safety guidelines to avoid electrical hazards and ensure optimal performance.
Post-Installation Checks
After installation, perform a thorough system test to ensure the humidifier operates correctly. Check water supply, drainage, and electrical connections for proper function and safety. Verify that the humidifier effectively maintains desired humidity levels and runs quietly. Ensure all components are securely fastened and aligned. Review the system’s performance to confirm it meets the specified requirements and operates efficiently without leaks or electrical issues.
Testing the Humidifier
After completing the installation, test the Aprilaire 700 humidifier to ensure proper operation. Turn on the power supply and check for water flow, drainage, and mist distribution. Verify that the humidifier activates when the furnace blower runs and shuts off correctly when not in use. Measure humidity levels using a hygrometer to confirm they align with the desired settings. Inspect all connections for leaks and ensure the system operates quietly. If any issues arise, consult the troubleshooting section of the manual. Proper testing ensures the humidifier functions efficiently and maintains optimal indoor air quality. This step is critical for validating the installation’s success.
Ensuring Proper Functionality
After installation, ensure the Aprilaire 700 humidifier operates correctly by verifying all connections, including water supply, drainage, and electrical wiring. Check for proper water flow and drainage to prevent leaks or blockages. Test the humidifier control to confirm it responds to humidity levels and operates in both manual and automatic modes. Ensure the system turns on and off as expected with the furnace blower. Seasonal adjustments may be necessary to optimize performance. Regularly inspect and clean the water panel to maintain efficiency. Ensure the drain is clear and functioning properly to avoid water damage. Proper functionality guarantees consistent humidity levels and system longevity.
Troubleshooting Common Issues
Identify common issues like no operation, incorrect humidity, or water leaks. Check power supply, water connections, drainage, and wiring. Ensure proper installation and consult manual for solutions.
Identifying Potential Problems
Common issues during Aprilaire 700 installation include water leaks, improper electrical connections, or drainage malfunctions. Check for faulty water supply lines, clogged drain hoses, or incorrect wiring. Ensure the humidifier is level and securely mounted. Verify that the water panel is correctly installed and that the bypass damper is functioning properly. Electrical issues may arise if the humidifier is not connected to the correct voltage or if the wiring diagram is not followed. Also, ensure the outdoor temperature sensor is properly connected for accurate humidity control. Addressing these potential problems early can prevent operational issues and ensure efficient performance of the system.
Resolving Installation-Related Issues
If issues arise during installation, start by reviewing the wiring diagram and ensuring all connections are secure. Check for proper water supply line installation and verify that the drain hose is not kinked or clogged. If the humidifier does not power on, confirm that it is receiving the correct voltage (120 VAC for models 700M and 700A). Ensure the outdoor temperature sensor is correctly installed and connected for accurate humidity control. Refer to the manual for troubleshooting steps or consult a qualified technician if problems persist. Properly addressing these issues ensures the system operates efficiently and maintains optimal indoor air quality.
Proper installation of the Aprilaire 700 ensures optimal performance, improving indoor air quality and system efficiency. Follow the manual for reliable, long-term humidity control and troubleshooting guidance.
Final Thoughts on Successful Installation
Successful installation of the Aprilaire 700 humidifier ensures optimal performance and improved indoor air quality. Proper preparation, adherence to the manual, and careful execution of each step are crucial. Regular maintenance and inspections will extend the system’s lifespan and efficiency. Always follow safety guidelines to avoid electrical hazards and ensure correct wiring. By completing the installation accurately, you’ll enjoy reliable humidity control and a healthier living environment. Refer to the manual for troubleshooting tips and maintenance schedules to keep your system functioning at its best. A well-installed Aprilaire 700 will provide long-term comfort and satisfaction for your home.
Importance of Following the Manual
Following the Aprilaire 700 installation manual is crucial for a safe and effective setup. The manual provides detailed instructions to ensure compliance with safety standards and manufacturer guidelines. Deviating from the manual can lead to improper installation, potentially voiding the warranty or causing electrical hazards. Proper wiring, water supply connections, and control setup are essential for optimal performance. Ignoring the manual’s instructions may result in malfunction or reduced system efficiency. Always refer to the manual for troubleshooting and maintenance tips to maintain your humidifier’s effectiveness. Adhering to the manual ensures a reliable and long-lasting solution for improving indoor air quality.