Welcome! This manual guides you through setting up and using your 1080P car DVR, ensuring optimal performance and safety on every journey.
What’s in the Box
Your Full HD 1080P Car DVR package includes: the DVR unit itself, a front camera, and potentially a rear camera with a connecting cable (19.68ft). You’ll also find an adjustable suction mount for secure windshield attachment, a car charger (11.48ft), a mini charging cable, and a 32GB microSD card for immediate recording.
Additional components include a wire trim tool for neat cable management, cable hiding clips, and a comprehensive user manual detailing all features and functions. Ensure all listed items are present before proceeding with setup.
Key Features of Your DVR
Experience peace of mind with this Full HD 1080P car DVR! It boasts loop recording, seamlessly overwriting older footage. The integrated G-sensor automatically detects impacts, saving critical event recordings. Enjoy clear visuals with night vision and HDR technology, even in low-light conditions.
Benefit from 24-hour parking monitor mode and motion detection for comprehensive surveillance. A wide-angle lens (140-180 degrees) captures a broad view of the road. The rotating lens and screen offer flexible positioning for optimal recording.

Device Overview
Familiarize yourself with the DVR’s components: front and rear cameras (if applicable), buttons, ports, and mounting system for optimal functionality.
Front Camera Specifications
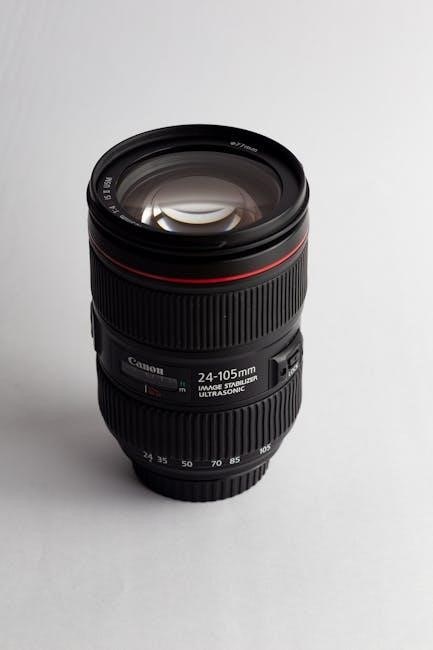
The front camera captures high-definition 1080P video, providing clear and detailed recordings of the road ahead. It features a wide 140-degree lens to maximize coverage, ensuring crucial details are never missed. A rotating lens, up to 180 degrees, allows for flexible positioning and optimal viewing angles.
Furthermore, the camera boasts HDR (High Dynamic Range) technology, enhancing image quality in varying lighting conditions. This ensures clear footage even during bright sunlight or nighttime driving. The sensor is optimized for low-light performance, delivering usable video in dimly lit environments. Expect sharp, reliable recordings with this advanced front camera system.
Rear Camera Specifications (If Applicable)
The rear camera, connected via a 19.68ft cable, expands your recording coverage to the back of your vehicle. It also captures footage in Full HD 1080P, complementing the front camera’s clarity. A wide viewing angle, approximately 120-140 degrees, minimizes blind spots and records potential incidents from behind;
Designed for durability, the rear camera is typically waterproof, ensuring reliable operation in various weather conditions. It works in tandem with the front camera, providing a comprehensive view of your surroundings. Proper cable routing, using the included wire trim tool, is essential for a clean installation.
Button and Port Identification
Your DVR features five key buttons: Power, R (likely for Rear camera control or settings), OK (for menu selection and confirmation), Lock (to protect current footage from overwriting), and the Power Port (for charging). The device incorporates a Mini charging cable port for power input.
A MicroSD card slot accommodates cards up to a specified capacity (typically 32GB or 64GB, check your model). The rear camera connects via a dedicated port. Understanding these controls and ports is crucial for efficient operation and accessing all features.
Initial Setup
Begin by securely installing the suction mount, connecting the power cable, and formatting a compatible MicroSD card for optimal recording.
Installing the Suction Mount
Securely attaching the suction mount is crucial for stable video capture. First, clean your windshield thoroughly with glass cleaner to ensure optimal adhesion. Press the suction cup firmly against the clean glass, ensuring a tight seal. Adjust the angle of the DVR using the ball joint for the desired recording perspective.
Avoid placing the mount in areas obstructed by mirrors, wipers, or other objects. Ensure the cable can reach a power source without creating a safety hazard. Regularly check the mount’s security, especially in varying temperatures, to prevent detachment during operation. A properly installed mount guarantees clear footage.
Powering On and Off
To power on your Full HD 1080P car DVR, simply press and hold the power button for approximately two seconds. A startup sequence will appear on the screen, indicating the device is initializing. To power off, repeat this process – press and hold the power button until the screen displays a shutdown message.
Automatic power off will occur if no activity is detected for a pre-set duration, conserving battery life. Ensure the device is properly connected to a power source for continuous operation, especially when utilizing parking monitor features.
Formatting the MicroSD Card
Before first use, and periodically thereafter, format the microSD card within the DVR’s settings menu. This ensures compatibility and optimal recording performance. Navigate to the settings menu, locate the “Format” option, and confirm the process. Warning: Formatting will erase all data on the card!
Use a high-quality microSD card, class 10 or higher, with a capacity of up to 32GB (or as specified by your model). Regularly formatting prevents file corruption and maintains reliable operation of your Full HD 1080P car DVR.

Recording Modes
Your DVR offers versatile recording options: standard, loop recording for continuous use, and emergency recording triggered by the built-in G-sensor.
Standard Recording Mode
In standard recording mode, your Full HD 1080P car DVR continuously captures video footage while the device is powered on. This is the default setting for normal driving conditions, providing a constant record of your surroundings. The DVR automatically saves recordings in segments, typically a few minutes each, to facilitate easy playback and file management. Ensure a formatted microSD card is inserted to store the captured video.
This mode prioritizes consistent video capture, offering a reliable record of your travels. Adjust video quality settings within the main menu to balance storage space and footage clarity.
Loop Recording Explained
Loop recording is a crucial feature that automatically overwrites the oldest video files when the microSD card reaches full capacity. This ensures continuous recording without manual intervention. When new footage is saved, the system seamlessly replaces the earliest files, maintaining a rolling record of your drives.
You can enable or disable loop recording within the DVR’s settings menu. This feature is essential for long journeys or when constant surveillance is needed, preventing the DVR from stopping recording.
Emergency Recording (G-Sensor Activation)
The G-Sensor detects sudden impacts or movements, like collisions or hard braking, automatically triggering emergency recording. This crucial feature safeguards vital footage, preventing it from being overwritten by loop recording. The DVR creates a separate “Emergency” file, protecting it from deletion.
Sensitivity levels for the G-Sensor are adjustable in the settings. Higher sensitivity means even minor bumps will trigger recording, while lower settings require more significant impact.

Advanced Features
Unlock enhanced functionality! Explore parking monitor, motion detection, and night vision optimization for comprehensive surveillance and peace of mind while driving.
Parking Monitor Mode Setup
Activate 24/7 protection! Parking Monitor utilizes the DVR’s G-sensor to detect impacts while parked. Ensure the DVR is connected to a power source via the car charger. Navigate to the settings menu and enable Parking Monitor.
Configure sensitivity levels to avoid false alarms. Note that internal battery life is limited (approximately 23 minutes) without continuous power; prolonged monitoring requires a hardwire kit (sold separately) for uninterrupted operation. This feature provides valuable evidence in hit-and-run situations or vandalism.
Motion Detection Configuration
Enhance security with motion sensing! When activated, the DVR automatically begins recording if movement is detected within its field of view while in standby mode. Access the settings menu to adjust the motion detection sensitivity. Higher sensitivity detects even minor movements, while lower settings reduce false triggers.
Customize detection zones to focus on specific areas. This feature is ideal for monitoring parking lots or areas prone to activity. Remember that excessive sensitivity can lead to frequent recordings and increased microSD card usage.
Night Vision Optimization
Maximize clarity in low-light conditions! Your DVR utilizes infrared technology for enhanced night vision. Ensure the lens is clean for optimal performance. Adjust the exposure settings within the menu to brighten or darken the footage, balancing visibility and reducing glare from headlights.
Consider ambient lighting; extremely dark environments may still result in grainy footage. Regularly check night vision recordings to fine-tune settings. Avoid aiming directly at bright light sources, as this can compromise image quality.

Menu Navigation
Access settings easily! Utilize the five keys – Power, R, OK, Lock, and Power Port – to navigate the intuitive menu system for customization.
Accessing the Main Menu
To enter the main menu, press the ‘OK’ button on your Full HD 1080P car DVR. This action will display a range of customizable settings on the screen. Use the ‘R’ button to navigate upwards through the menu options, and the Power button to scroll downwards.
Highlight your desired setting, then press ‘OK’ again to select it. To return to the previous menu or exit entirely, repeatedly press the Power button until you reach your desired screen. Familiarize yourself with this process for effortless control of your DVR’s features.
Adjusting Video Settings (Resolution, Quality)
Within the main menu, locate the “Video Settings” option and select it using the ‘OK’ button. Here, you can customize your recording parameters. Resolution options typically include 1080P (Full HD), and potentially lower settings for extended recording times.
Adjust the video quality; higher quality settings capture more detail but require more storage space. Experiment to find a balance that suits your needs. Remember to save your changes before exiting the menu!
Date and Time Settings
Accurate date and time stamping is crucial for evidence and organization. Access the “Date & Time” settings within the main menu. Use the directional buttons to navigate and adjust the year, month, day, hour, and minute.
Ensure the time format (12/24 hour) is set to your preference. Confirm your selections and save the changes. Incorrect date/time settings can render recordings less useful, so double-check for accuracy!
Playback and File Management
Review recorded footage directly on the DVR screen or transfer files to your computer via the provided USB cable for easy viewing and storage.
Viewing Recorded Footage on the DVR
Accessing Recordings: To view recorded videos directly on your DVR, navigate to the playback menu using the device’s buttons. The interface will display a list of recorded files, typically organized by date and time. Use the directional buttons to scroll through the available footage.
Playback Controls: Once a video is selected, press the ‘OK’ or ‘Play’ button to begin playback. Standard controls like pause, fast forward, and rewind are usually available. The screen will display the video with associated information, such as the recording date and time. Ensure sufficient battery or a connected power source for extended viewing sessions.
Transferring Files to a Computer
Connecting the DVR: To transfer footage, connect your DVR to your computer using the provided mini-USB cable. Your computer should recognize the device as a removable storage drive. If prompted, select ‘File Transfer’ or ‘MTP’ mode. Alternatively, remove the microSD card and insert it directly into a card reader connected to your computer.
Locating Files: Once connected, navigate to the DVR’s storage or the microSD card within your computer’s file explorer. Recorded videos are typically stored in a DCIM or similar folder. Copy the desired files to your computer for safekeeping or editing.
Deleting Files
On the DVR: Access the file management section within the DVR’s menu. Select the files you wish to delete, typically by date and time. Confirm your selection when prompted – deleted files are usually unrecoverable. Be cautious when deleting important recordings, like those captured during an incident.
On a Computer: Alternatively, transfer files to your computer and delete them as you would any other digital file. This provides a backup before deletion. Regularly deleting older footage frees up storage space on the microSD card for new recordings;

Troubleshooting
Facing issues? This section offers solutions to common problems, including power failures, recording errors, and microSD card malfunctions, for smooth operation.
DVR Not Powering On
Problem: Your dash cam fails to turn on, even when connected to the car’s power source. First, verify the car’s cigarette lighter or USB port is functioning correctly by testing with another device.
Solution: Ensure the power cable is securely connected to both the DVR and the vehicle. Try a different USB cable and wall adapter for testing. Check the internal battery; it may require charging if the device hasn’t been used for an extended period. If issues persist, a reset might be necessary – consult the manual for reset procedures. Remember, internal batteries are small and have limited capacity.
Recording Issues
Problem: The DVR isn’t recording, or footage is corrupted. Confirm a properly formatted microSD card is inserted and has sufficient storage space. A faulty or incompatible card can cause recording failures.
Solution: Try a different, high-quality microSD card (Class 10 or higher recommended). Ensure loop recording isn’t disabled, as a full card will stop recording without it. Check lens obstructions; dirt or smudges can affect video quality. Verify date and time settings are correct for proper file naming and organization.
MicroSD Card Errors
Issue: The DVR displays “Card Error” or fails to recognize the microSD card. This often indicates a formatting issue, card corruption, or incompatibility. Always use a card specifically designed for dash cams.
Troubleshooting: First, re-insert the card. If the error persists, format the card within the DVR’s menu (this is crucial!). If formatting fails, try a different microSD card. Avoid high-capacity cards (over 128GB) as some DVRs have compatibility limitations. Regularly back up footage to prevent data loss.

Maintenance and Care
Keep your DVR functioning optimally by regularly cleaning the lens and storing it properly when not in use, plus checking for firmware updates.
Cleaning the Lens
Maintaining a clear lens is crucial for optimal video quality. Dust, fingerprints, and smudges can significantly reduce clarity, especially during nighttime recording. To clean the lens, always power off the DVR first. Use a soft, lint-free microfiber cloth – the type used for eyeglasses is ideal.
Gently wipe the lens in a circular motion. Avoid using harsh chemicals, abrasive cleaners, or excessive pressure, as these can damage the coating. If necessary, lightly dampen the cloth with lens cleaning solution specifically designed for optics. Ensure the lens is completely dry before powering the DVR back on. Regular cleaning will ensure consistently sharp and clear recordings.
Proper Storage
When not in use, store your Full HD 1080P car DVR in a cool, dry place, away from direct sunlight and extreme temperatures. Avoid leaving the device in a vehicle for extended periods, particularly during hot weather, as this can damage the internal components and battery.
Keep the DVR in its original packaging or a protective case to prevent scratches and physical damage. Ensure the suction mount is detached to avoid leaving marks on the windshield. Do not store the device near magnetic fields or sources of moisture. Proper storage extends the lifespan of your DVR.
Firmware Updates
Regular firmware updates are crucial for maintaining optimal performance and accessing new features on your Full HD 1080P car DVR. Check the manufacturer’s website periodically for available updates and detailed instructions. Typically, updates are downloaded to a microSD card and then installed through the DVR’s menu.
Before updating, ensure the DVR has sufficient battery power or remains connected to a power source. Do not interrupt the update process, as this could damage the device. Firmware updates often improve stability, fix bugs, and enhance compatibility.

Safety Information
Prioritize safety! Avoid obstructing your view while driving and operate the DVR within the specified temperature range for optimal function.
Operating Temperature
Optimal Performance Range: Your Full HD 1080P car DVR is designed to function reliably within a specific temperature range. Operating the device outside of this range may lead to malfunctions, reduced battery life, or even permanent damage.
Recommended Temperatures: For best results, use the DVR in ambient temperatures between 32°F (0°C) and 140°F (60°C). Avoid prolonged exposure to extreme heat, such as direct sunlight inside a parked car during summer, as this can overheat the device.
Cold Weather Considerations: In cold environments, allow the DVR to warm up slightly before operation to ensure proper functionality. Storing the device in extremely cold temperatures for extended periods is also not recommended.
Avoiding Obstructions
Clear View is Crucial: To ensure optimal recording quality and safety, it’s vital to maintain a clear field of view for your Full HD 1080P car DVR’s lens. Any obstructions can significantly impair the device’s ability to capture crucial footage.
Windshield Obstacles: Avoid placing stickers, toll tags, or other objects directly in front of the camera lens. Regularly clean the windshield to remove dirt, dust, and grime that may obscure the view.
Internal Blockages: Ensure nothing inside the vehicle obstructs the rear camera’s view, if applicable. Proper placement and maintenance are key to reliable operation.
Legal Considerations
Know Your Local Laws: Before using your Full HD 1080P car DVR, familiarize yourself with the laws regarding dash cam usage in your region. Regulations vary significantly concerning audio recording, video visibility, and placement within the vehicle.
Privacy Concerns: Be mindful of privacy laws when recording audio. Some jurisdictions require consent from individuals being recorded. Avoid intentionally recording conversations outside your vehicle without proper authorization.
Evidence Admissibility: Understand that footage may not be automatically admissible as evidence in all legal proceedings. Consult with legal counsel for specific guidance.

Warranty Information
Coverage Details: Your DVR is covered by a limited warranty against manufacturing defects. Please refer to the included warranty card for specifics.
Warranty Coverage Details
This warranty covers defects in materials and workmanship under normal use. It does not cover damage from misuse, accidents, unauthorized modifications, or natural disasters. The warranty period begins on the original purchase date.
Specifically, we guarantee the DVR’s functionality, including recording, playback, and basic feature operation. Accessories like the suction mount or charging cable have a shorter, 90-day warranty. To initiate a claim, contact customer support with proof of purchase.
Shipping costs for warranty service are the responsibility of the customer. We reserve the right to repair or replace the defective unit at our discretion.
Contacting Customer Support
For assistance, please visit our website at [insert website address here] to access our comprehensive FAQ section and troubleshooting guides. You can also submit a support ticket directly through the website for personalized help.
Alternatively, you can reach our dedicated customer support team via email at [insert email address here] or by phone at [insert phone number here] during our business hours, Monday to Friday, 9 AM to 5 PM EST.
Please have your DVR model number and proof of purchase readily available when contacting us.